0.学习目标
- 了解面向接口开发方式
- 实现数据校验功能
- 实现短信发送功能
- 实现注册功能
- 实现根据用户名和密码查询用户功能
1.创建用户中心
用户搜索到自己心仪的商品,接下来就要去购买,但是购买必须先登录。所以接下来我们编写用户中心,实现用户的登录和注册功能。
用户中心的提供的服务:
- 用户的注册
- 用户登录
- 用户个人信息管理
- 用户地址管理
- 用户收藏管理
这里我们暂时先实现基本的:注册和登录功能,其它功能大家可以自行补充完整。
因为用户中心的服务其它微服务也会调用,因此这里我们做聚合:
- ly-user:父工程,包含3个子工程:
- ly-user-interface:接口
- ly-user-pojo:实体
- ly-user-service:业务和服务
1.1.创建父module
创建
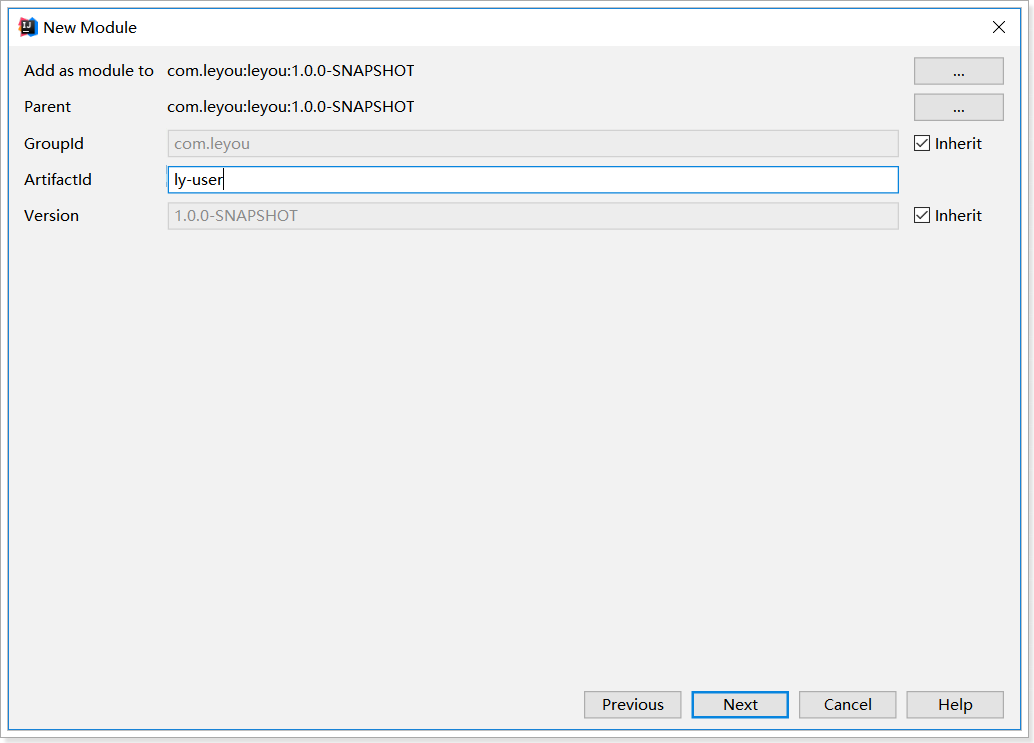
位置:
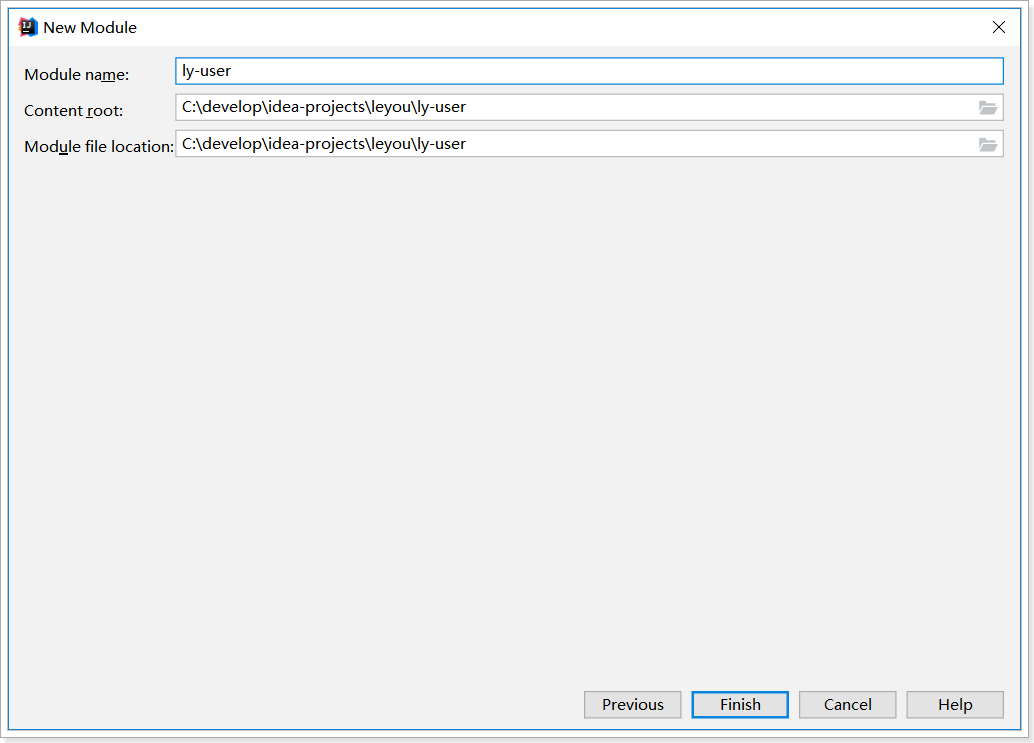
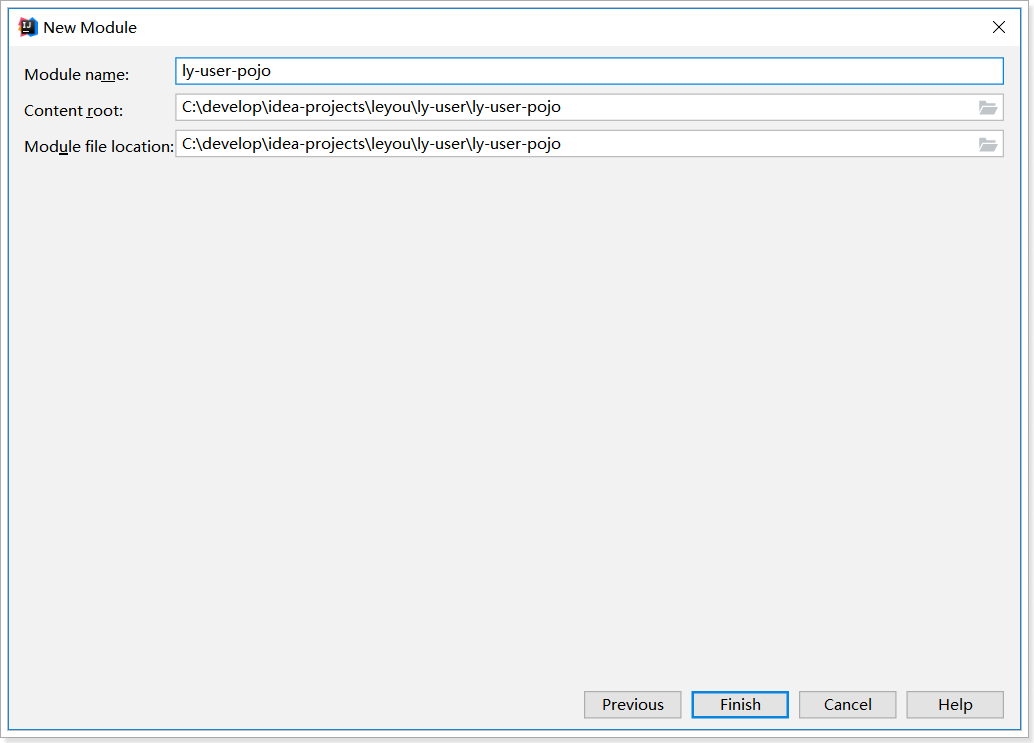
1.1.创建ly-user-pojo
项目坐标:
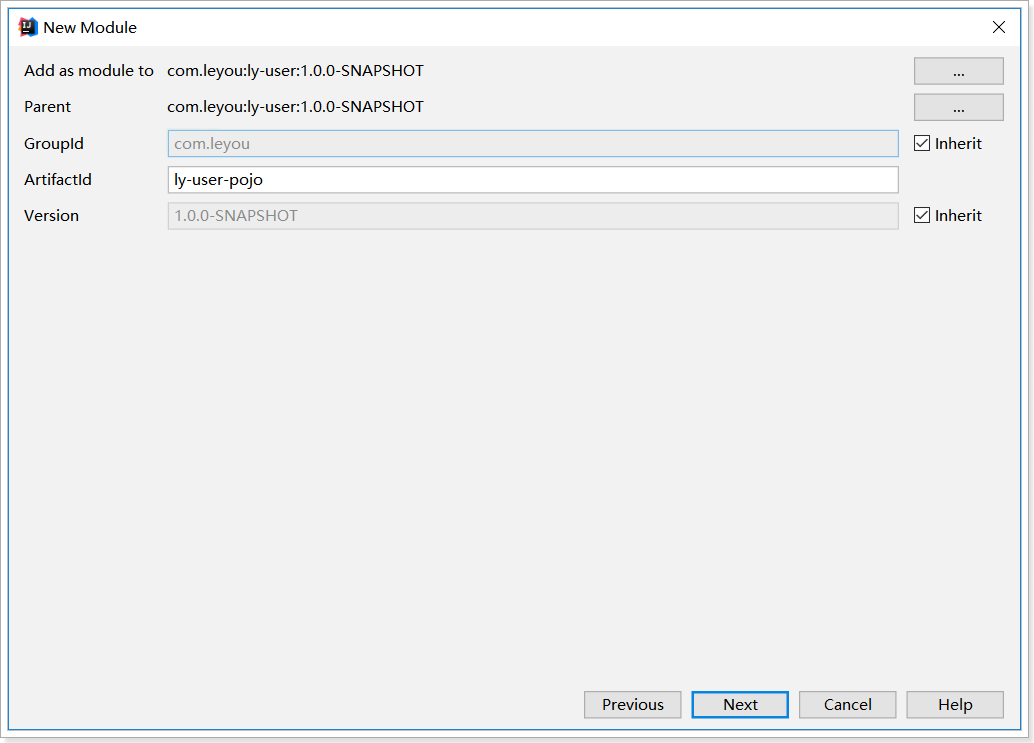
保存的位置:
pom:
1
2
3
4
5
6
7
8
9
10
11
12
13
14
15
16
17
18
19
20
21
| <?xml version="1.0" encoding="UTF-8"?>
<project xmlns="http://maven.apache.org/POM/4.0.0"
xmlns:xsi="http://www.w3.org/2001/XMLSchema-instance"
xsi:schemaLocation="http://maven.apache.org/POM/4.0.0 http://maven.apache.org/xsd/maven-4.0.0.xsd">
<parent>
<artifactId>ly-user</artifactId>
<groupId>com.leyou</groupId>
<version>1.0.0-SNAPSHOT</version>
</parent>
<modelVersion>4.0.0</modelVersion>
<artifactId>ly-user-pojo</artifactId>
<dependencies>
<dependency>
<groupId>com.fasterxml.jackson.core</groupId>
<artifactId>jackson-databind</artifactId>
<version>2.9.8</version>
</dependency>
</dependencies>
</project>
|
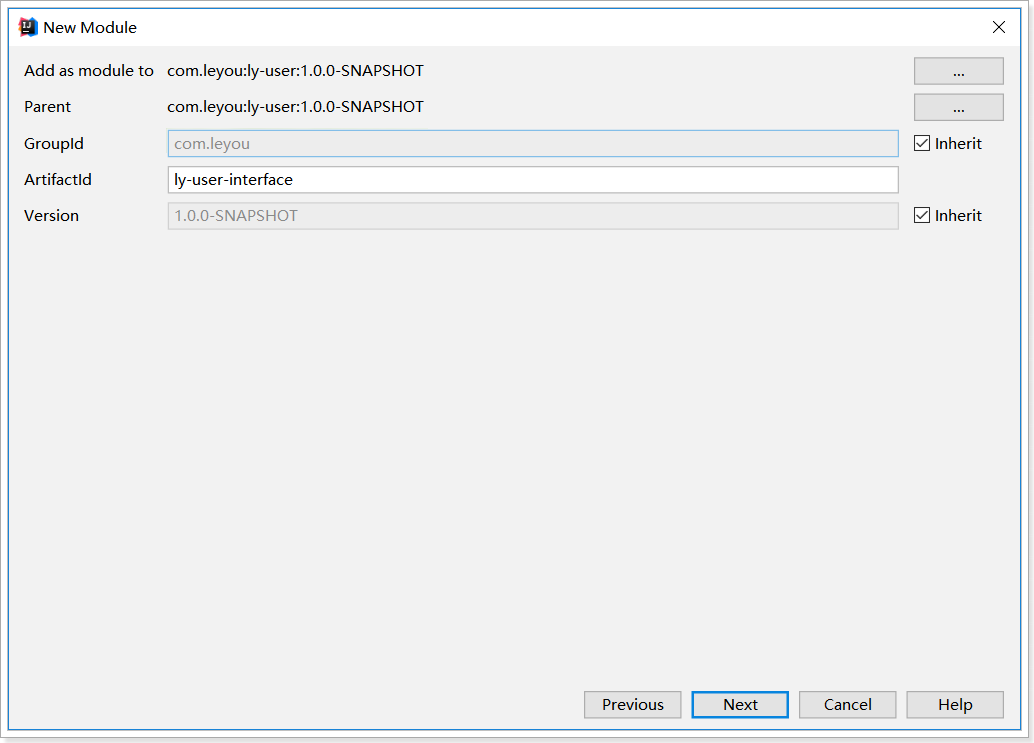
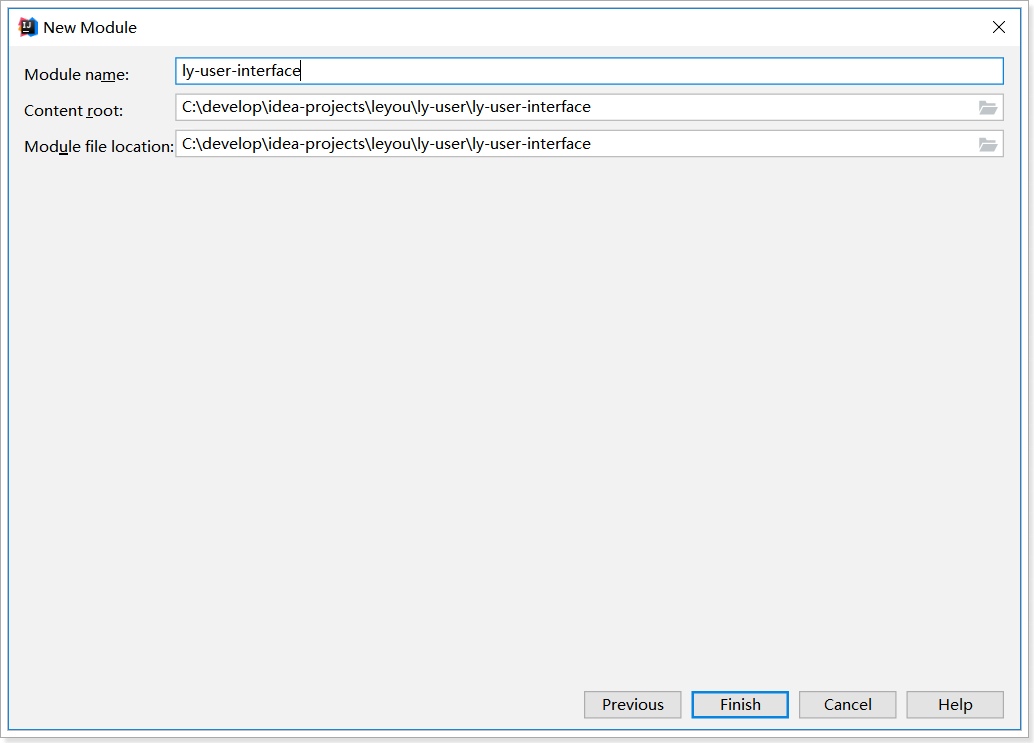
1.2.创建ly-user-interface
创建module:
位置:
pom:
1
2
3
4
5
6
7
8
9
10
11
12
13
14
15
16
17
18
19
20
21
| <?xml version="1.0" encoding="UTF-8"?>
<project xmlns="http://maven.apache.org/POM/4.0.0"
xmlns:xsi="http://www.w3.org/2001/XMLSchema-instance"
xsi:schemaLocation="http://maven.apache.org/POM/4.0.0 http://maven.apache.org/xsd/maven-4.0.0.xsd">
<parent>
<artifactId>ly-user</artifactId>
<groupId>com.leyou</groupId>
<version>1.0.0-SNAPSHOT</version>
</parent>
<modelVersion>4.0.0</modelVersion>
<artifactId>ly-user-interface</artifactId>
<dependencies>
<dependency>
<groupId>com.leyou</groupId>
<artifactId>ly-user-pojo</artifactId>
<version>1.0.0-SNAPSHOT</version>
</dependency>
</dependencies>
</project>
|
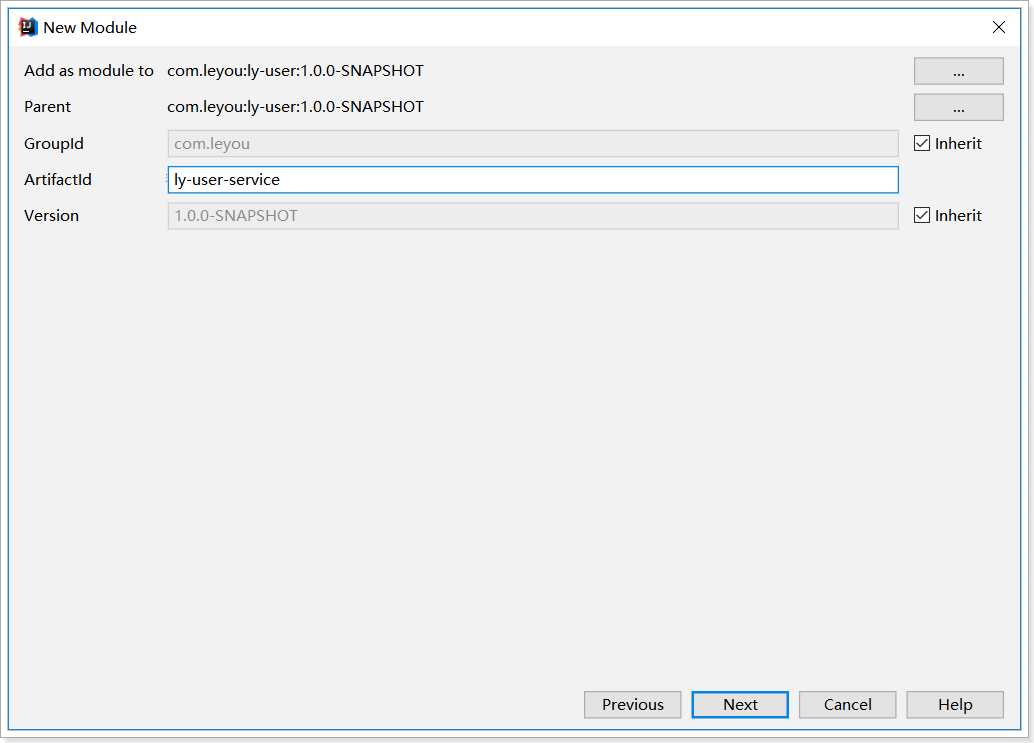
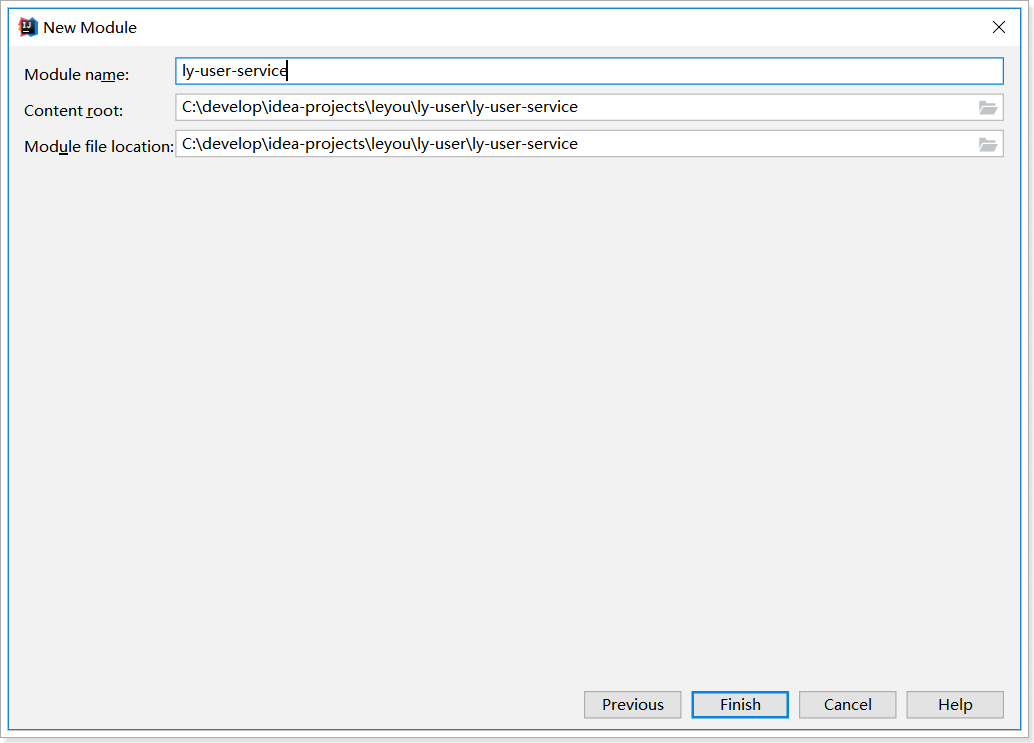
1.3.创建ly-user-service
创建module
pom
1
2
3
4
5
6
7
8
9
10
11
12
13
14
15
16
17
18
19
20
21
22
23
24
25
26
27
28
29
30
31
32
33
34
35
36
37
38
39
40
41
42
43
44
45
46
47
48
49
50
51
52
53
54
| <?xml version="1.0" encoding="UTF-8"?>
<project xmlns="http://maven.apache.org/POM/4.0.0"
xmlns:xsi="http://www.w3.org/2001/XMLSchema-instance"
xsi:schemaLocation="http://maven.apache.org/POM/4.0.0 http://maven.apache.org/xsd/maven-4.0.0.xsd">
<parent>
<artifactId>ly-user</artifactId>
<groupId>com.leyou</groupId>
<version>1.0.0-SNAPSHOT</version>
</parent>
<modelVersion>4.0.0</modelVersion>
<artifactId>ly-user-service</artifactId>
<dependencies>
<dependency>
<groupId>org.springframework.boot</groupId>
<artifactId>spring-boot-starter-web</artifactId>
</dependency>
<dependency>
<groupId>org.springframework.cloud</groupId>
<artifactId>spring-cloud-starter-netflix-eureka-client</artifactId>
</dependency>
<dependency>
<groupId>tk.mybatis</groupId>
<artifactId>mapper-spring-boot-starter</artifactId>
</dependency>
<dependency>
<groupId>mysql</groupId>
<artifactId>mysql-connector-java</artifactId>
</dependency>
<dependency>
<groupId>com.leyou</groupId>
<artifactId>ly-user-pojo</artifactId>
<version>1.0.0-SNAPSHOT</version>
</dependency>
<dependency>
<groupId>com.leyou</groupId>
<artifactId>ly-common</artifactId>
<version>1.0.0-SNAPSHOT</version>
</dependency>
</dependencies>
<build>
<plugins>
<plugin>
<groupId>org.springframework.boot</groupId>
<artifactId>spring-boot-maven-plugin</artifactId>
</plugin>
</plugins>
</build>
</project>
|
启动类
1
2
3
4
5
6
7
8
| @SpringBootApplication
@EnableDiscoveryClient
@MapperScan("com.leyou.user.mapper")
public class LyUserApplication {
public static void main(String[] args) {
SpringApplication.run(LyUserApplication.class,args);
}
}
|
配置:
1
2
3
4
5
6
7
8
9
10
11
12
13
14
15
16
17
18
19
20
21
22
23
24
25
| server:
port: 8085
spring:
application:
name: user-service
datasource:
driver-class-name: com.mysql.jdbc.Driver
url: jdbc:mysql://127.0.0.1:3306/heima
username: root
password: root
eureka:
client:
service-url:
defaultZone: http://127.0.0.1:10086/eureka
instance:
ip-address: 127.0.0.1
prefer-ip-address: true
mybatis:
type-aliases-package: com.leyou.user.entity
configuration:
map-underscore-to-camel-case: true
logging:
level:
com.leyou: debug
|
父工程ly-user的pom:
1
2
3
4
5
6
7
8
9
10
11
12
13
14
15
16
17
18
19
| <?xml version="1.0" encoding="UTF-8"?>
<project xmlns="http://maven.apache.org/POM/4.0.0"
xmlns:xsi="http://www.w3.org/2001/XMLSchema-instance"
xsi:schemaLocation="http://maven.apache.org/POM/4.0.0 http://maven.apache.org/xsd/maven-4.0.0.xsd">
<parent>
<artifactId>leyou</artifactId>
<groupId>com.leyou</groupId>
<version>1.0.0-SNAPSHOT</version>
</parent>
<modelVersion>4.0.0</modelVersion>
<artifactId>ly-user</artifactId>
<packaging>pom</packaging>
<modules>
<module>ly-user-pojo</module>
<module>ly-user-interface</module>
<module>ly-user-service</module>
</modules>
</project>
|
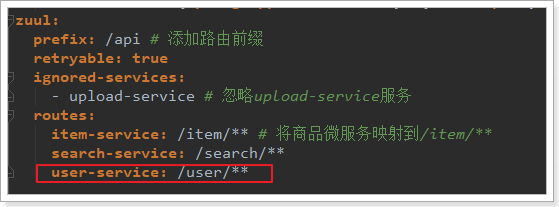
1.4.添加网关路由
我们修改ly-api-gateway,添加路由规则,对ly-user-service进行路由:
2.后台功能准备
2.1.接口文档
整个用户中心的开发,我们将模拟公司内面向接口的开发。因为在前后端分离的开发模式中,后端人员只需要对外提供接口,而不需要关心页面的实现。为了使前后端可以同时开发,必须让前端与后端基于相同的接口,声明每一个接口的路径、参数、返回值等属性。
现在假设项目经理已经设计好了接口文档,详见:《用户中心接口说明.md》
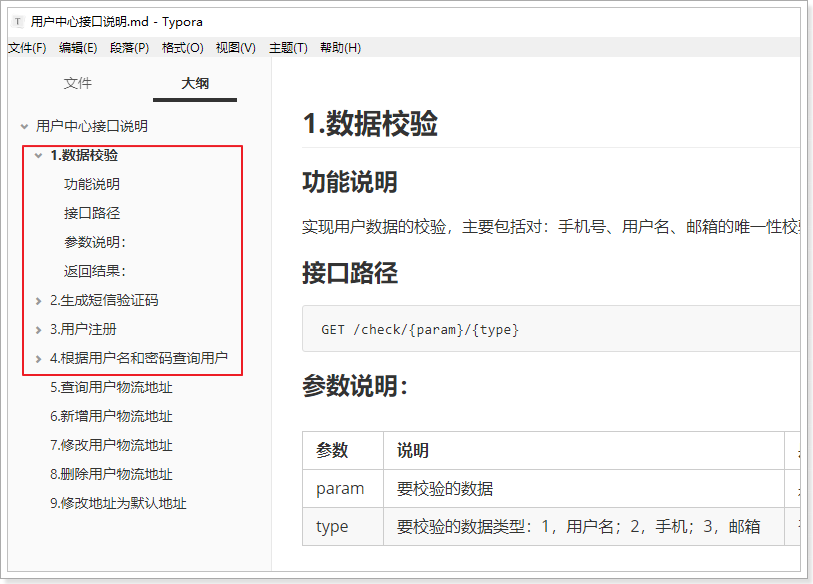
我们将根据文档直接编写后台功能,不关心页面实现。
2.2.数据结构
1
2
3
4
5
6
7
8
9
10
11
| CREATE TABLE `tb_user` (
`id` bigint(20) NOT NULL AUTO_INCREMENT,
`username` varchar(32) NOT NULL COMMENT '用户名',
`password` varchar(60) NOT NULL COMMENT '密码,加密存储',
`phone` varchar(11) DEFAULT NULL COMMENT '注册手机号',
`create_time` timestamp NULL DEFAULT CURRENT_TIMESTAMP COMMENT '创建时间',
`update_time` timestamp NULL DEFAULT CURRENT_TIMESTAMP ON UPDATE CURRENT_TIMESTAMP COMMENT '更新时间',
PRIMARY KEY (`id`),
UNIQUE KEY `username` (`username`) USING BTREE,
UNIQUE KEY `phone` (`phone`)
) ENGINE=InnoDB AUTO_INCREMENT=30 DEFAULT CHARSET=utf8 COMMENT='用户表';
|
数据结构比较简单,因为根据用户名查询的频率较高,所以我们给用户名创建了索引
2.3.基本代码
实体类
1
2
3
4
5
6
7
8
9
10
11
12
13
14
15
16
17
18
19
20
21
| package com.leyou.user.entity;
import lombok.Data;
import tk.mybatis.mapper.annotation.KeySql;
import javax.persistence.Id;
import javax.persistence.Table;
import java.util.Date;
@Table(name = "tb_user")
@Data
public class User {
@Id
@KeySql(useGeneratedKeys = true)
private Long id;
private String username;
private String password;
private String phone;
private Date createTime;
private Date updateTime;
}
|
mapper
1
2
3
4
5
6
7
| package com.leyou.user.mapper;
import com.leyou.user.entity.User;
import tk.mybatis.mapper.common.Mapper;
public interface UserMapper extends Mapper<User> {
}
|
Service
1
2
3
4
5
6
| @Service
public class UserService {
@Autowired
private UserMapper userMapper;
}
|
3.数据验证功能
3.1.接口说明:
接口路径
1
| GET /check/{data}/{type}
|
参数说明:
| 参数 |
说明 |
是否必须 |
数据类型 |
默认值 |
| data |
要校验的数据 |
是 |
String |
无 |
| type |
要校验的数据类型:1,用户名;2,手机 |
是 |
Integer |
无 |
返回结果:
返回布尔类型结果:
状态码:
- 200:校验成功
- 400:参数有误
- 500:服务器内部异常
3.2.controller
因为有了接口,我们可以不关心页面,所有需要的东西都一清二楚:
- 请求方式:GET
- 请求路径:/check/{param}/{type}
- 请求参数:param,type
- 返回结果:true或false
1
2
3
4
5
6
7
8
9
10
11
12
13
14
15
16
17
18
19
20
21
22
23
24
25
26
27
| package com.leyou.user.web;
import com.leyou.user.service.UserService;
import org.springframework.beans.factory.annotation.Autowired;
import org.springframework.http.ResponseEntity;
import org.springframework.web.bind.annotation.GetMapping;
import org.springframework.web.bind.annotation.PathVariable;
import org.springframework.web.bind.annotation.RestController;
@RestController
public class UserController {
@Autowired
private UserService userService;
@GetMapping("/check/{data}/{type}")
public ResponseEntity<Boolean> checkUserData(@PathVariable("data") String data, @PathVariable(value = "type") Integer type) {
return ResponseEntity.ok(userService.checkData(data, type));
}
}
|
3.3.Service
1
2
3
4
5
6
7
8
9
10
11
12
13
14
15
16
17
18
19
20
21
22
23
24
25
26
27
28
29
30
31
| package com.leyou.user.service;
import com.leyou.common.enums.ExceptionEnum;
import com.leyou.common.exceptions.LyException;
import com.leyou.user.entity.User;
import com.leyou.user.mapper.UserMapper;
import org.springframework.beans.factory.annotation.Autowired;
import org.springframework.stereotype.Service;
@Service
public class UserService {
@Autowired
private UserMapper userMapper;
public Boolean checkData(String data, Integer type) {
User u = new User();
switch (type) {
case 1:
u.setUsername(data);
break;
case 2:
u.setPhone(data);
break;
default:
throw new LyException(ExceptionEnum.INVALID_PARAM_ERROR);
}
int count = userMapper.selectCount(u);
return count == 0;
}
}
|
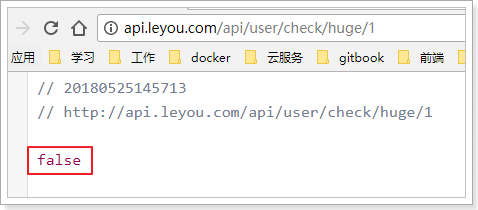
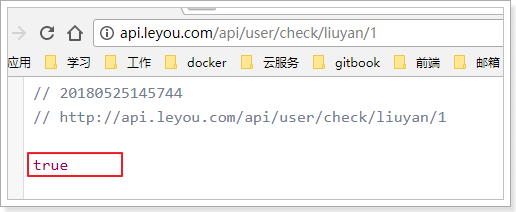
3.4.测试
我们在数据库插入一条假数据:

然后在浏览器调用接口,测试:
4.发送短信功能
短信微服务已经准备好,我们就可以继续编写用户中心接口了。
4.1.接口说明
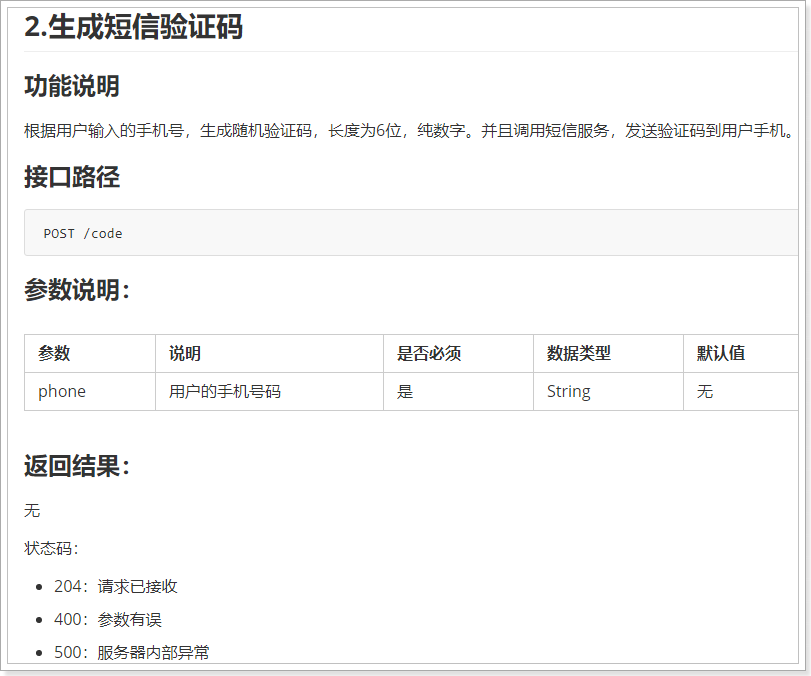
这里的业务逻辑是这样的:
- 1)我们接收页面发送来的手机号码
- 2)生成一个随机验证码
- 3)将验证码保存在服务端
- 4)发送短信,将验证码发送到用户手机
那么问题来了:验证码保存在哪里呢?
验证码有一定有效期,一般是5分钟,我们可以利用Redis的过期机制来保存。
4.3.controller
1
2
3
4
5
6
7
8
9
|
@PostMapping("/code")
public ResponseEntity<Void> sendCode(@RequestParam("phone") String phone){
userService.sendCode(phone);
return ResponseEntity.status(HttpStatus.NO_CONTENT).build();
}
|
4.4.service
这里的逻辑会稍微复杂:
- 生成随机验证码
- 将验证码保存到Redis中,用来在注册的时候验证
- 发送验证码到
ly-sms-service服务,发送短信
因此,我们需要引入Redis和AMQP:
1
2
3
4
5
6
7
8
| <dependency>
<groupId>org.springframework.boot</groupId>
<artifactId>spring-boot-starter-data-redis</artifactId>
</dependency>
<dependency>
<groupId>org.springframework.boot</groupId>
<artifactId>spring-boot-starter-amqp</artifactId>
</dependency>
|
添加RabbitMQ和Redis配置:
1
2
3
4
5
6
7
8
| spring:
redis:
host: 192.168.206.66
rabbitmq:
host: 192.168.206.66
username: leyou
password: leyou
virtual-host: /leyou
|
Service代码:
1
2
3
4
5
6
7
8
9
10
11
12
13
14
15
16
17
18
| public void sendCode(String phone) {
if (!RegexUtils.isPhone(phone)) {
throw new LyException(ExceptionEnum.INVALID_PHONE_NUMBER);
}
String code = RandomStringUtils.randomNumeric(6);
redisTemplate.opsForValue().set(KEY_PREFIX + phone, code, 1, TimeUnit.MINUTES);
Map<String, String> msg = new HashMap<>();
msg.put("phone", phone);
msg.put("code", code);
amqpTemplate.convertAndSend(SMS_EXCHANGE_NAME, VERIFY_CODE_KEY, msg);
}
|
注意:
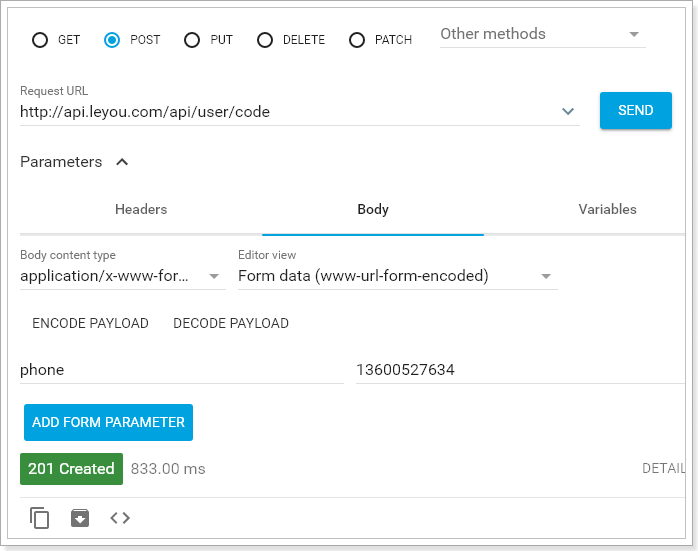
4.5.测试
通过RestClient发送请求试试:
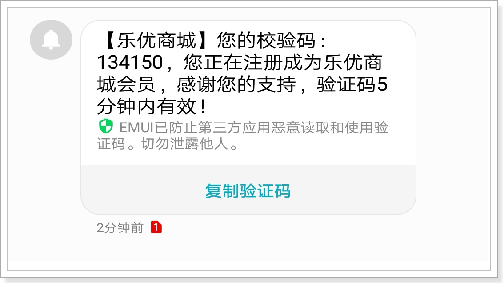
查看Redis中的数据:

查看短信:
5.注册功能
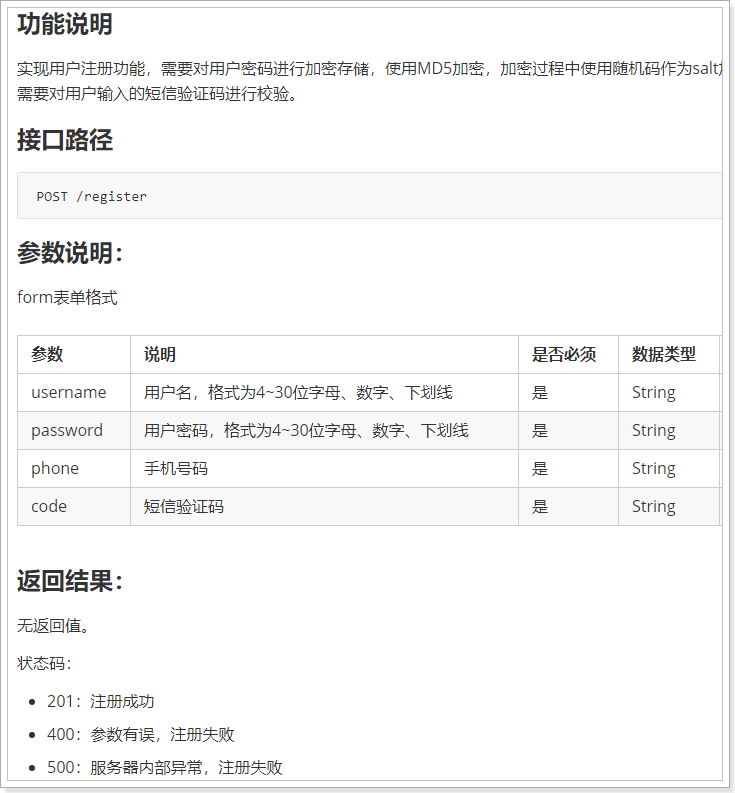
5.1.接口说明
5.2.controller
1
2
3
4
5
| @PostMapping("register")
public ResponseEntity<Void> register(User user, @RequestParam("code") String code){
userService.register(user, code);
return ResponseEntity.status(HttpStatus.CREATED).build();
}
|
5.3.service
基本逻辑:
- 1)校验短信验证码
- 2)对密码加密
- 3)写入数据库
密码加密:
密码加密使用传统的MD5加密并不安全,这里我们使用的是Spring提供的BCryptPasswordEncoder加密算法,分成加密和验证两个过程:
为了防止有人能根据密文推测出salt,我们需要在使用BCryptPasswordEncoder时配置随即密钥:
1
2
3
4
5
6
7
8
9
10
11
12
13
14
15
16
17
18
19
20
21
22
23
24
25
26
27
28
| package com.leyou.user.config;
import lombok.Data;
import org.springframework.boot.context.properties.ConfigurationProperties;
import org.springframework.context.annotation.Bean;
import org.springframework.context.annotation.Configuration;
import org.springframework.security.crypto.bcrypt.BCryptPasswordEncoder;
import org.springframework.security.crypto.password.PasswordEncoder;
import java.security.SecureRandom;
@Data
@Configuration
@ConfigurationProperties(prefix = "ly.encoder.crypt")
public class PasswordConfig {
private int strength;
private String secret;
@Bean
public BCryptPasswordEncoder passwordEncoder(){
SecureRandom secureRandom = new SecureRandom(secret.getBytes());
return new BCryptPasswordEncoder(strength, secureRandom);
}
}
|
在配置文件中配置属性:
1
2
3
4
5
| ly:
encoder:
crypt:
secret: ${random.uuid}
strength: 10
|
代码:
1
2
3
4
5
6
7
8
9
10
11
12
13
14
15
16
17
18
19
| @Autowired
private BCryptPasswordEncoder passwordEncoder;
public void register(User user, String code) {
String cacheCode = redisTemplate.opsForValue().get(KEY_PREFIX + user.getPhone());
if (!StringUtils.equals(code, cacheCode)) {
throw new LyException(ExceptionEnum.INVALID_VERIFY_CODE);
}
user.setPassword(passwordEncoder.encode(user.getPassword()));
int count = userMapper.insertSelective(user);
if (count != 1) {
throw new LyException(ExceptionEnum.INSERT_OPERATION_FAIL);
}
}
|
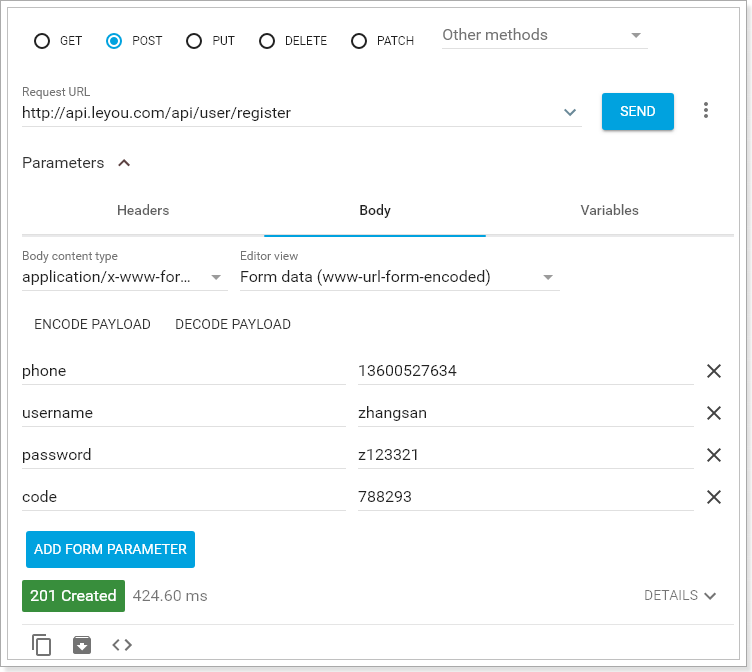
5.4.测试
我们通过RestClient测试:
查看数据库:

5.5.服务端数据校验
刚才虽然实现了注册,但是服务端并没有进行数据校验,而前端的校验是很容易被有心人绕过的。所以我们必须在后台添加数据校验功能:
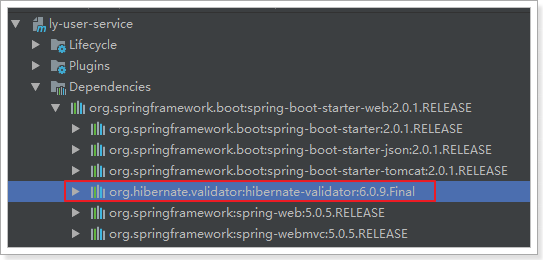
我们这里会使用Hibernate-Validator框架完成数据校验:
而SpringBoot的web启动器中已经集成了相关依赖:
5.5.1.什么是Hibernate Validator
Hibernate Validator是Hibernate提供的一个开源框架,使用注解方式非常方便的实现服务端的数据校验。
官网:http://hibernate.org/validator/
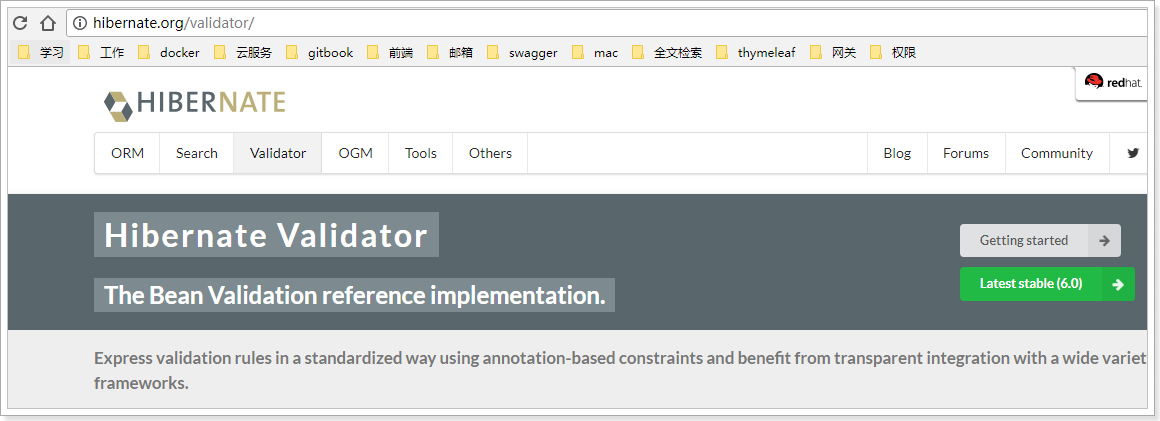
hibernate Validator 是 Bean Validation 的参考实现 。
Hibernate Validator 提供了 JSR 303 规范中所有内置 constraint(约束) 的实现,除此之外还有一些附加的 constraint。
在日常开发中,Hibernate Validator经常用来验证bean的字段,基于注解,方便快捷高效。
5.5.2.Bean校验的注解
常用注解如下:
| Constraint |
详细信息 |
| @Valid |
被注释的元素是一个对象,需要检查此对象的所有字段值 |
| @Null |
被注释的元素必须为 null |
| @NotNull |
被注释的元素必须不为 null |
| @AssertTrue |
被注释的元素必须为 true |
| @AssertFalse |
被注释的元素必须为 false |
| @Min(value) |
被注释的元素必须是一个数字,其值必须大于等于指定的最小值 |
| @Max(value) |
被注释的元素必须是一个数字,其值必须小于等于指定的最大值 |
| @DecimalMin(value) |
被注释的元素必须是一个数字,其值必须大于等于指定的最小值 |
| @DecimalMax(value) |
被注释的元素必须是一个数字,其值必须小于等于指定的最大值 |
| @Size(max, min) |
被注释的元素的大小必须在指定的范围内 |
| @Digits (integer, fraction) |
被注释的元素必须是一个数字,其值必须在可接受的范围内 |
| @Past |
被注释的元素必须是一个过去的日期 |
| @Future |
被注释的元素必须是一个将来的日期 |
| @Pattern(value) |
被注释的元素必须符合指定的正则表达式 |
| @Email |
被注释的元素必须是电子邮箱地址 |
| @Length |
被注释的字符串的大小必须在指定的范围内 |
| @NotEmpty |
被注释的字符串的必须非空 |
| @Range |
被注释的元素必须在合适的范围内 |
| @NotBlank |
被注释的字符串的必须非空 |
| @URL(protocol=,host=, port=,regexp=, flags=) |
被注释的字符串必须是一个有效的url |
| @CreditCardNumber |
被注释的字符串必须通过Luhn校验算法,银行卡,信用卡等号码一般都用Luhn计算合法性 |
5.5.3.给User添加校验
我们在User对象的部分属性上添加注解:
1
2
3
4
5
6
7
8
9
10
11
12
13
14
15
| @Table(name = "tb_user")
@Data
public class User {
@Id
@KeySql(useGeneratedKeys = true)
private Long id;
@Pattern(regexp = RegexPatterns.USERNAME_REGEX, message = "用户名格式不正确")
private String username;
@Length(min = 4, max = 30, message = "密码格式不正确")
private String password;
@Pattern(regexp = RegexPatterns.PHONE_REGEX, message = "手机号格式不正确")
private String phone;
private Date createTime;
private Date updateTime;
}
|
5.5.4.在controller上进行控制
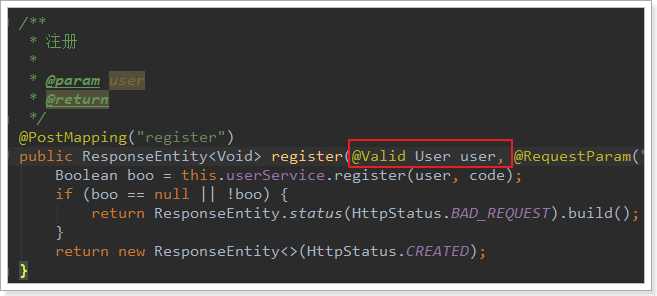
在controller中只需要给User添加 @Valid注解即可。
5.5.5.测试
我们故意填错:
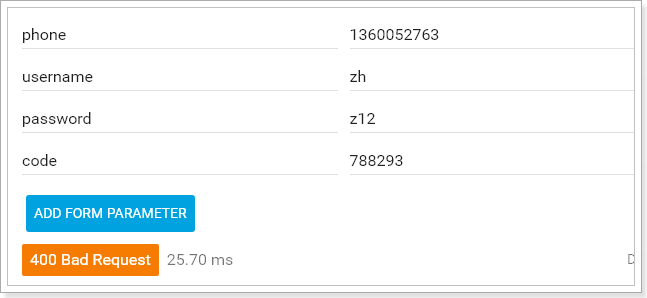
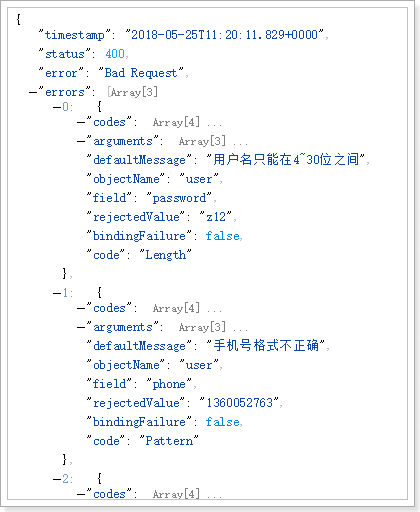
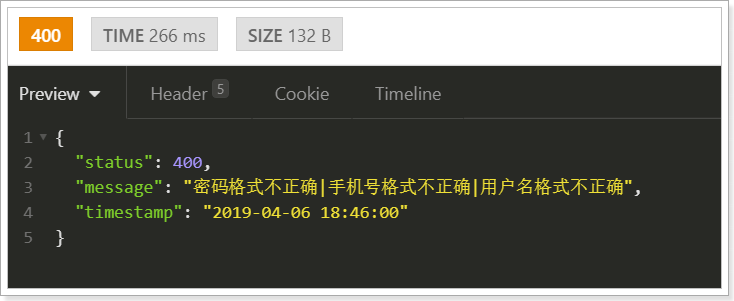
然后SpringMVC会自动返回错误信息:
如果需要自定义返回结果,可以这么写:
1
2
3
4
5
6
7
8
9
10
11
12
13
14
|
@PostMapping("register")
public ResponseEntity<Void> register(@Valid User user, BindingResult result, @RequestParam("code") String code){
if (result.hasErrors()) {
String msg = result.getFieldErrors().stream().map(FieldError::getDefaultMessage)
.collect(Collectors.joining("|"));
throw new LyException(400, msg);
}
userService.register(user, code);
return ResponseEntity.status(HttpStatus.CREATED).build();
}
|
我们在User参数后面跟一个BindingResult参数,不管校验是否通过,都会进入方法内部。如何判断校验是否通过呢?
BindingResult中会封装错误结果,我们通过result.hashErrors来判断是否有错误,然后使用result.getFieldErrors来获取错误信息。
再次测试:
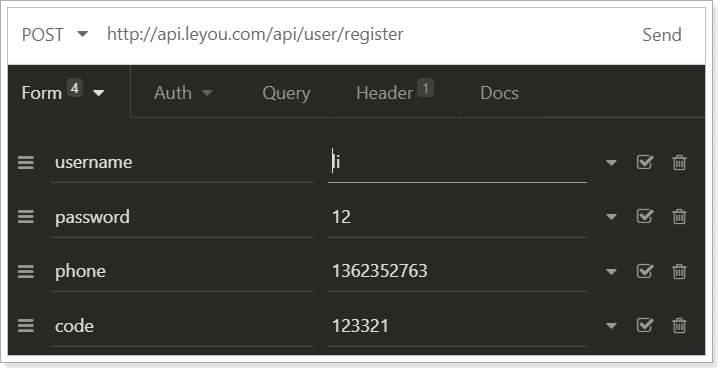
结果:
6.根据用户名和密码查询用户
6.1.接口说明
功能说明
查询功能,根据参数中的用户名和密码查询指定用户
接口路径
参数说明:
form表单格式
| 参数 |
说明 |
是否必须 |
数据类型 |
默认值 |
| username |
用户名,格式为4~30位字母、数字、下划线 |
是 |
String |
无 |
| password |
用户密码,格式为4~30位字母、数字、下划线 |
是 |
String |
无 |
返回结果:
用户的json格式数据
1
2
3
4
5
| {
"id": 6572312,
"username":"test",
"phone":"13688886666",
}
|
状态码:
- 200:查询成功
- 400:用户名或密码错误
- 500:服务器内部异常,查询失败
这里要返回的结果与数据库字段不一致,需要在ly-user-pojo中定义一个dto:
1
2
3
4
5
6
7
8
9
10
11
| package com.leyou.user.dto;
import lombok.Data;
@Data
public class UserDTO {
private Long id;
private String username;
private String phone;
}
|
6.2.controller
1
2
3
4
5
6
7
8
9
10
11
|
@GetMapping("query")
public ResponseEntity<UserDTO> queryUserByUsernameAndPassword(
@RequestParam("username") String username, @RequestParam("password") String password){
return ResponseEntity.ok(userService.queryUserByUsernameAndPassword(username, password));
}
|
6.3.service
1
2
3
4
5
6
7
8
9
10
11
12
13
14
15
16
17
18
| public UserDTO queryUserByUsernameAndPassword(String username, String password) {
User u = new User();
u.setUsername(username);
User user = userMapper.selectOne(u);
if (user == null) {
throw new LyException(ExceptionEnum.INVALID_USERNAME_PASSWORD);
}
if(!passwordEncoder.matches(password, user.getPassword())){
throw new LyException(ExceptionEnum.INVALID_USERNAME_PASSWORD);
}
return BeanHelper.copyProperties(user, UserDTO.class);
}
|
要注意,查询时也要对密码进行加密后判断是否一致。
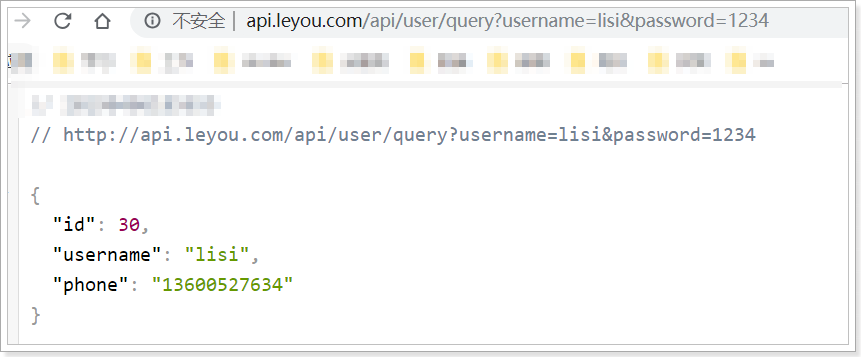
6.4.测试
我们通过RestClient测试:
7.Swagger-UI
完成了用户中心接口的开发,接下来我们就要测试自己的接口了,而且为了方便前段调用和参考,我们最好提供一份更直观的api文档,这里我们介绍一个工具,叫做swagger-ui
什么是swagger呢?swagger是对Open-API的一种实现。那么,什么是OpenAPI呢?
7.1.什么是OpenAPI
随着互联网技术的发展,现在的网站架构基本都由原来的后端渲染,变成了:前端渲染、前后端分离的形态,而且前端技术和后端技术在各自的道路上越走越远。 前端和后端的唯一联系,变成了API接口;API文档变成了前后端开发人员联系的纽带,变得越来越重要。
没有API文档工具之前,大家都是手写API文档的,在什么地方书写的都有,而且API文档没有统一规范和格式,每个公司都不一样。这无疑给开发带来了灾难。
OpenAPI规范(OpenAPI Specification 简称OAS)是Linux基金会的一个项目,试图通过定义一种用来描述API格式或API定义的语言,来规范RESTful服务开发过程。目前V3.0版本的OpenAPI规范已经发布并开源在github上 。
官网:https://github.com/OAI/OpenAPI-Specification
7.2.什么是swagger?
OpenAPI是一个编写API文档的规范,然而如果手动去编写OpenAPI规范的文档,是非常麻烦的。而Swagger就是一个实现了OpenAPI规范的工具集。
官网:https://swagger.io/
看官方的说明:
Swagger包含的工具集:
- Swagger编辑器: Swagger Editor允许您在浏览器中编辑YAML中的OpenAPI规范并实时预览文档。
- Swagger UI: Swagger UI是HTML,Javascript和CSS资产的集合,可以从符合OAS标准的API动态生成漂亮的文档。
- Swagger Codegen:允许根据OpenAPI规范自动生成API客户端库(SDK生成),服务器存根和文档。
- Swagger Parser:用于解析来自Java的OpenAPI定义的独立库
- Swagger Core:与Java相关的库,用于创建,使用和使用OpenAPI定义
- Swagger Inspector(免费): API测试工具,可让您验证您的API并从现有API生成OpenAPI定义
- SwaggerHub(免费和商业): API设计和文档,为使用OpenAPI的团队构建。
7.3.快速入门
SpringBoot已经集成了Swagger,使用简单注解即可生成swagger的API文档。
7.3.1.引入依赖
1
2
3
4
5
6
7
8
9
10
| <dependency>
<groupId>io.springfox</groupId>
<artifactId>springfox-swagger2</artifactId>
<version>2.8.0</version>
</dependency>
<dependency>
<groupId>io.springfox</groupId>
<artifactId>springfox-swagger-ui</artifactId>
<version>2.8.0</version>
</dependency>
|
7.3.2.编写配置
1
2
3
4
5
6
7
8
9
10
11
12
13
14
15
16
17
18
19
20
21
22
23
24
25
26
27
28
29
30
31
32
33
34
| package com.leyou.user.config;
import org.springframework.context.annotation.Bean;
import org.springframework.context.annotation.Configuration;
import springfox.documentation.builders.ApiInfoBuilder;
import springfox.documentation.builders.PathSelectors;
import springfox.documentation.builders.RequestHandlerSelectors;
import springfox.documentation.service.ApiInfo;
import springfox.documentation.spi.DocumentationType;
import springfox.documentation.spring.web.plugins.Docket;
import springfox.documentation.swagger2.annotations.EnableSwagger2;
@Configuration
@EnableSwagger2
public class SwaggerConfig {
@Bean
public Docket api() {
return new Docket(DocumentationType.SWAGGER_2)
.host("localhost:8085")
.apiInfo(apiInfo())
.select()
.apis(RequestHandlerSelectors.basePackage("com.leyou.user.web"))
.paths(PathSelectors.any())
.build();
}
private ApiInfo apiInfo() {
return new ApiInfoBuilder()
.title("乐优商城用户中心")
.description("乐优商城用户中心接口文档")
.version("1.0")
.build();
}
}
|
7.3.3.启动测试
重启服务,访问:http://localhost:8085/swagger-ui.html
就能看到swagger-ui为我们提供的API页面了:

可以看到我们编写的4个接口,任意点击一个,即可看到接口的详细信息:
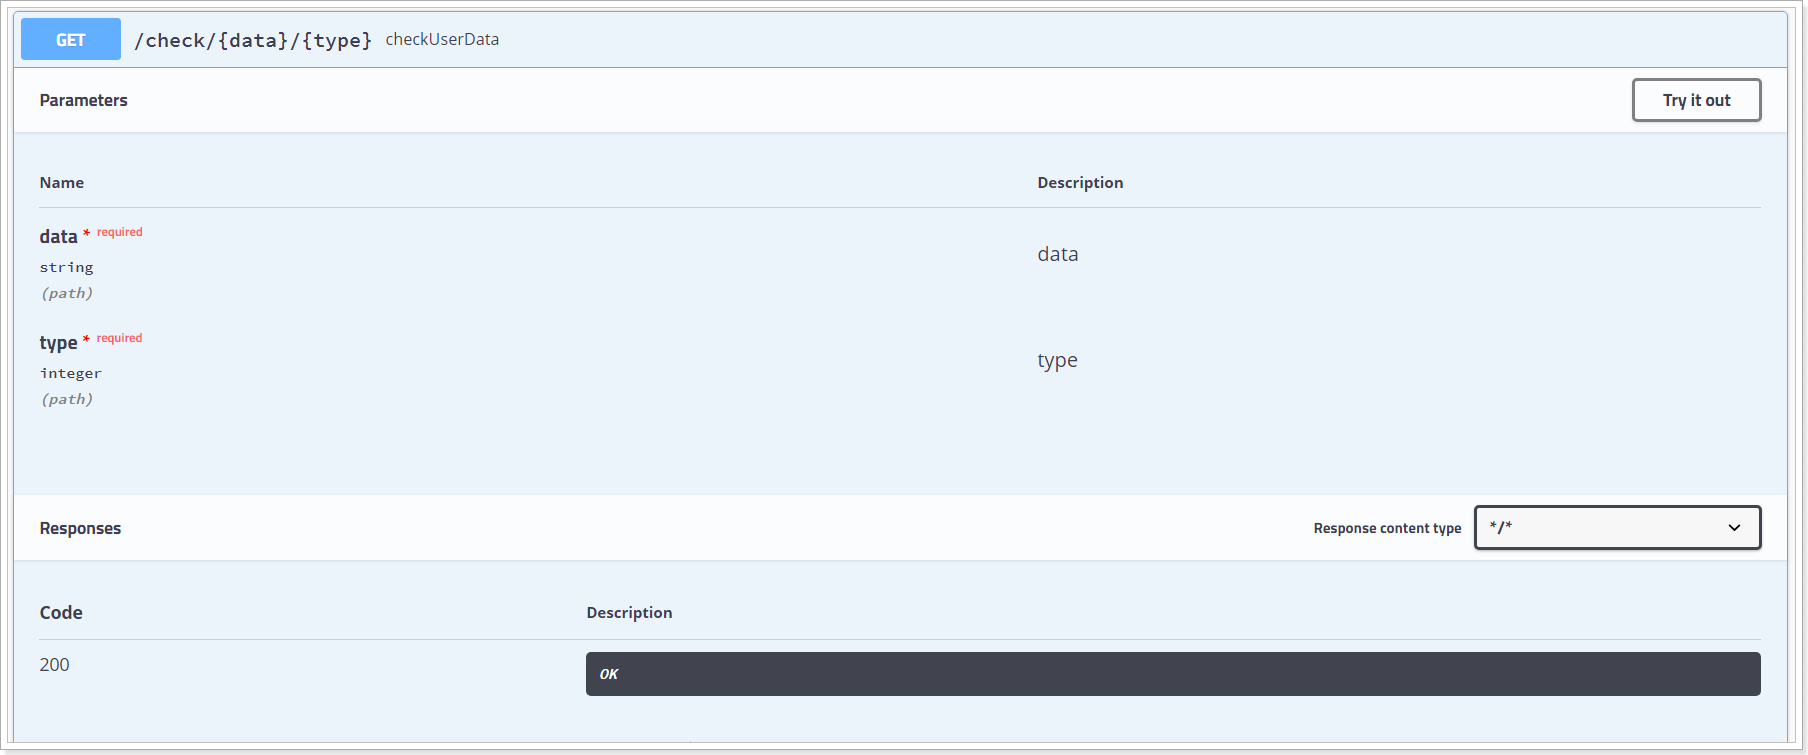
可以看到详细的接口声明,包括:
点击右上角的try it out!还可以测试接口:
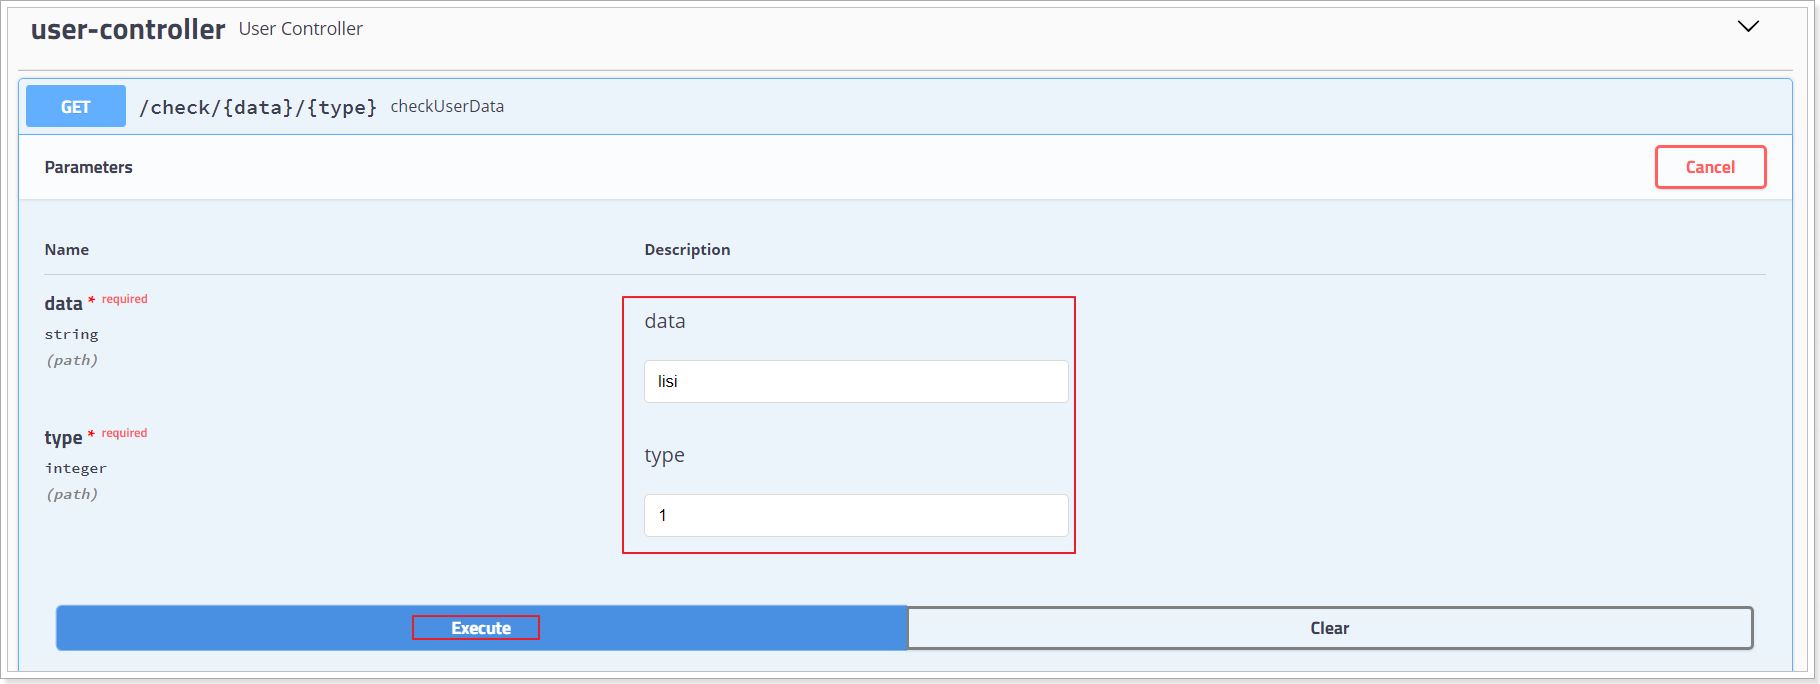
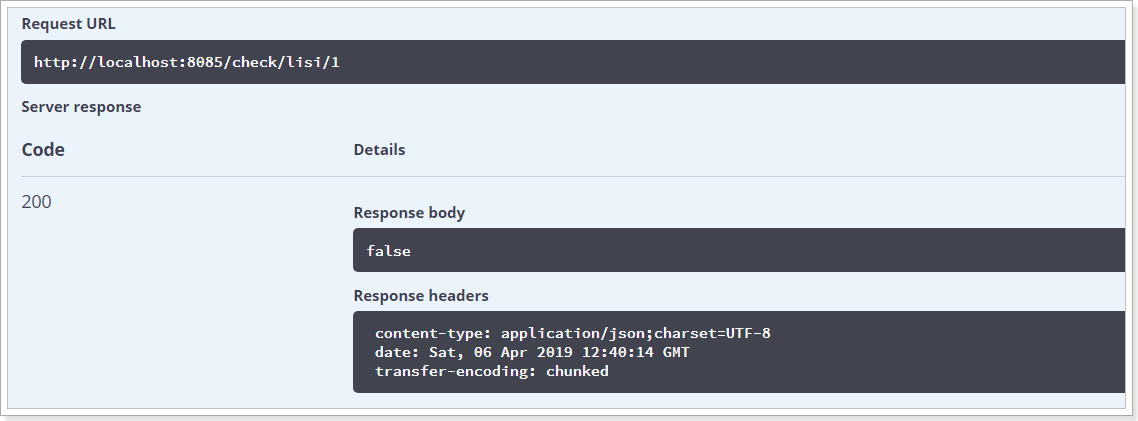
填写参数信息,点击execute,可以发起请求并测试:
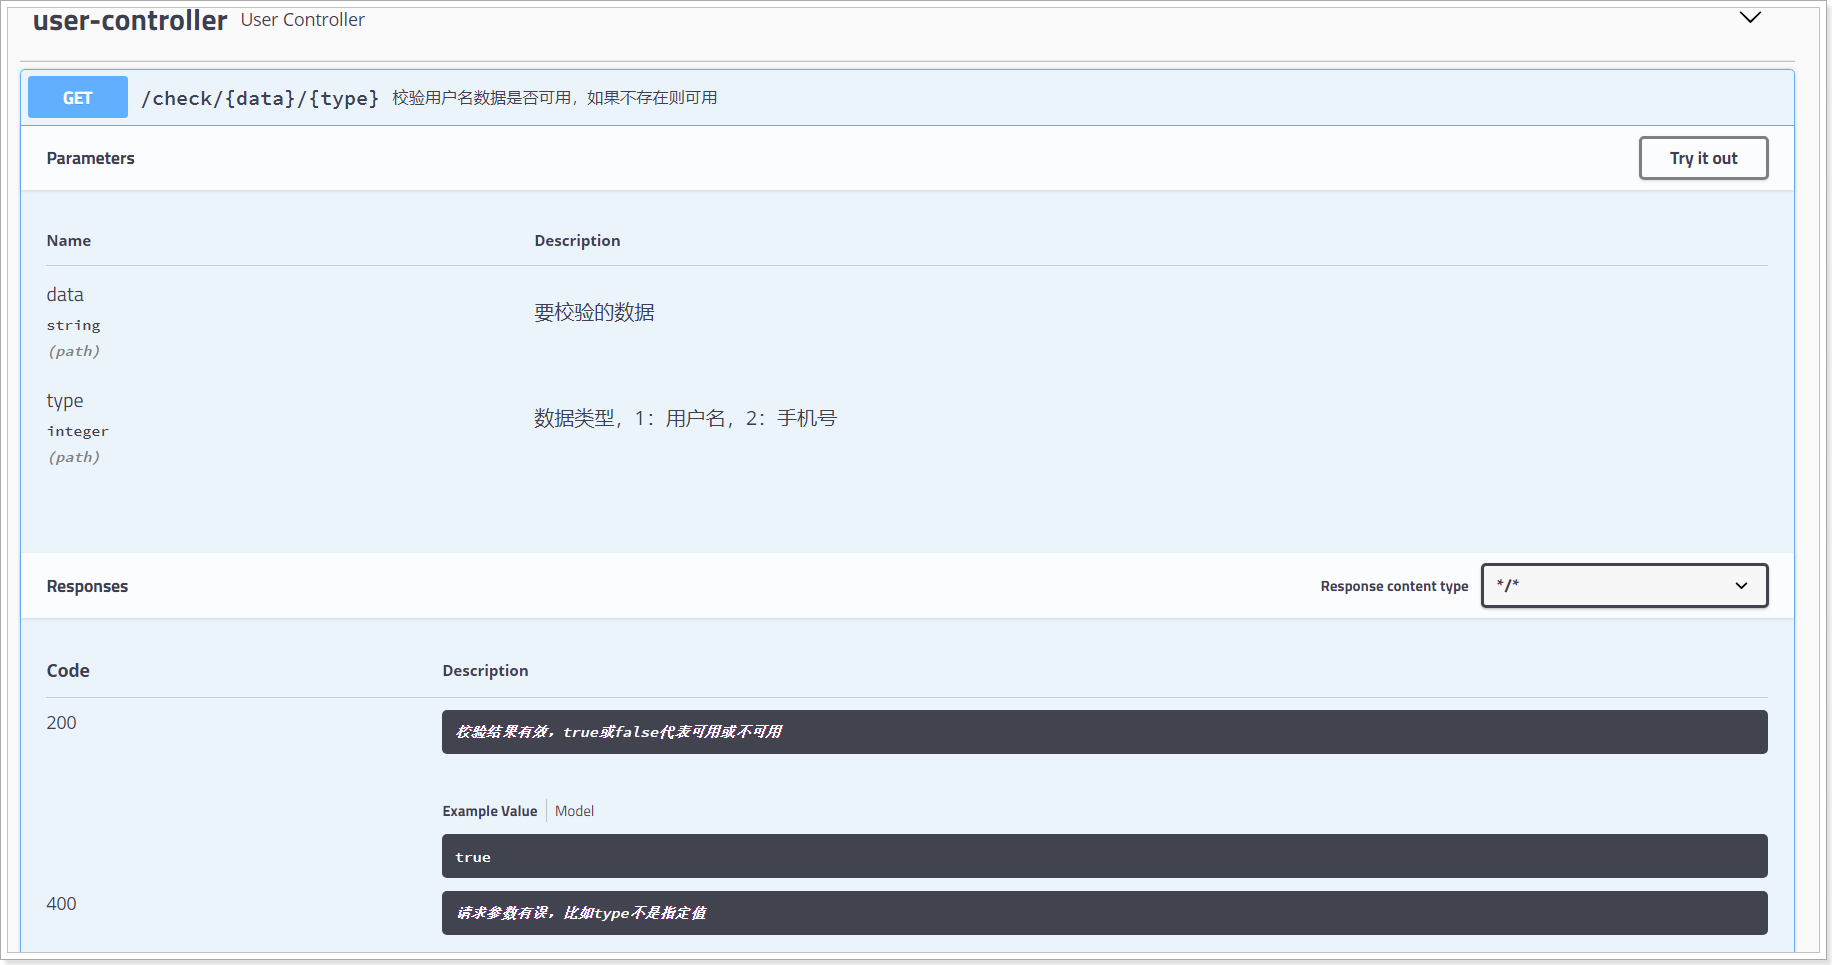
7.4.自定义接口说明
刚才的文档说明中,是swagge-ui根据接口自动生成,不够详细。如果有需要,可以通过注解自定义接口声明。常用的注解包括:
示例:
1
2
3
4
5
6
7
8
9
10
11
12
13
14
15
16
17
|
@GetMapping("/check/{data}/{type}")
@ApiOperation(value = "校验用户名数据是否可用,如果不存在则可用")
@ApiResponses({
@ApiResponse(code = 200, message = "校验结果有效,true或false代表可用或不可用"),
@ApiResponse(code = 400, message = "请求参数有误,比如type不是指定值")
})
public ResponseEntity<Boolean> checkUserData(
@ApiParam(value = "要校验的数据", example = "lisi") @PathVariable("data") String data,
@ApiParam(value = "数据类型,1:用户名,2:手机号", example = "1") @PathVariable(value = "type") Integer type) {
return ResponseEntity.ok(userService.checkData(data, type));
}
|
查看文档:
